Flutter: Difference between revisions
| Line 338: | Line 338: | ||
*Implement Build | *Implement Build | ||
*Call setState() method to make changes | *Call setState() method to make changes | ||
==TextField=== | |||
Below and example of a TextField | |||
<syntaxhighlight lang="dart"> | <syntaxhighlight lang="dart"> | ||
class HelloYou extends StatefulWidget { | class HelloYou extends StatefulWidget { | ||
| Line 381: | Line 383: | ||
</syntaxhighlight> | </syntaxhighlight> | ||
Note the onSubmitted works the same as onChanged except it waits for the Enter button before being fired | Note the onSubmitted works the same as onChanged except it waits for the Enter button before being fired | ||
==Dropdown button== | |||
Not much surprise again except for how to create the list seemed a bit long winded compared to other languages. | |||
<syntaxhighlight lang="dart"> | |||
DropdownButton<String>( | |||
value: _selectedCurrency, | |||
items: _currencies.map((String value) { | |||
return DropdownMenuItem<String>( | |||
value: value, child: Text(value)); | |||
}).toList(), | |||
onChanged: (String value) { | |||
setState(() => {_selectedCurrency = value}); | |||
}, | |||
), | |||
</syntaxhighlight> | |||
Revision as of 11:52, 15 December 2020
Introduction
Why Flutter created in 2017
- Compiles to native, JIT and Ahead of Time
- Fast Development
- Single Code Base
- Uses Dart
Resources is https://github.com/simoales/flutter
Installation
Flutter
You can switch versions of flutter using the channel option where there are options of master, dev, beta etc. See https://github.com/flutter/flutter/wiki/Flutter-build-release-channels
sudo snap install flutter --classic
sudo snap install flutter-gallery
flutter channel dev
flutter upgrade
flutter config --enable-linux-desktop
You will need to specify the path to android studio
flutter config --android-studio-dir="/opt/android-studio-4.1/android-studio"
Android Studio
For Android Studio the flutter SDK will be in /home/(username)/snap/flutter/common/flutter
Flutter doctor
You can run flutter doctor to see if all went well. This is what I got
flutter doctor
[✓] Flutter (Channel dev, 1.25.0-8.0.pre, on Linux, locale en_NZ.UTF-8)
[✓] Android toolchain - develop for Android devices (Android SDK version 30.0.3)
[✓] Linux toolchain - develop for Linux desktop
[!] Android Studio (not installed)
[✓] VS Code (version 1.52.0)
[✓] Connected device (1 available)
Creating a Project
In VS Code run flutter doctor and then flutter new project. Project names must be in lower case. e.g. hello_flutter. This opens a new VS Code with the project. The import contains the widgets to use and the rest just configures the widgets on the screen. I.E. Text is like a <Text /> tag in react or angular.
import 'package:flutter/material.dart';

void main() {
  runApp(Center(
    child: Text("Fred Was Ere",
        textDirection: TextDirection.ltr,
        style: TextStyle(backgroundColor: Colors.blue)),
  ));
}
When familar we can create a project with the flutter cli
flutter create app_widgets
A Bigger Example
So a bigger example might be
import 'package:flutter/material.dart';

void main() {
  runApp(MaterialApp(
    title: "My lovely App",
    home: Scaffold(
      appBar: AppBar(
        title: Text("App Bar Title"),
      ),
      body: Material(
        color: Colors.deepPurple,
        child: Center(
          child: Text(
            "Fred Was Ere",
            textDirection: TextDirection.ltr,
            style: TextStyle(color: Colors.white, fontSize: 36.0),
          ),
        ),
      ),
    ),
  ));
}
Classes
Things are getting a big large so we need to break the code down. We do this by writing our own classes. We can derive a class from StatelessWidget to do this.
class MyWidget extends StatelessWidget {
  @override
  Widget build(BuildContext context) {
    return MaterialApp(
      title: "My lovely App",
      home: Scaffold(
        appBar: AppBar(
          title: Text("App Bar Title"),
        ),
        body: Material(
          color: Colors.deepPurple,
          child: Center(
            child: Text(
              "Fred Was Ere",
              textDirection: TextDirection.ltr,
              style: TextStyle(color: Colors.white, fontSize: 36.0),
            ),
          ),
        ),
      ),
    );
  }
}
Fat Arrow
Dart supports the fat arrow approach so we can so
import './screens/home.dart';

void main() {
  runApp(MyWidget());
}
Can become
import './screens/home.dart';

void main() => runApp(MyWidget());
Adding Logic
No surprises here. We can add functions within the class declaration.
import 'package:flutter/material.dart';

class Home extends StatelessWidget {
  @override
  Widget build(BuildContext context) {
    return Material(
      color: Colors.deepPurple,
      child: Center(
        child: Text(
          sayHello(),
          textDirection: TextDirection.ltr,
          style: TextStyle(color: Colors.white, fontSize: 36.0),
        ),
      ),
    );
  }

  String sayHello() {
    var hello;
    DateTime now = DateTime.now();
    if (now.hour < 12) {
      hello = "Good Morning";
    } else if (now.hour < 18) {
      hello = "Good Afternoon";
    } else {
      hello = "Good Evening";
    }
    return hello;
  }
}
Basic Widgets and Concepts
The basic widgets and Concepts are
- Container
- Text
- Row & Column
- Image
- RaisedButton
- AlertDialog
- Box Constraints
- Size, Margin and Padding
Containers
They are as they sound. It is worth noting the width and height are controlled by the parent. Look at https://flutter.io/layout. To bypass the constraint of the parent you need to wrap your widget in a widget which supports this. E.g. Center widget.
import 'package:flutter/material.dart';

class Home extends StatelessWidget {
  @override
  Widget build(BuildContext context) {
    return Center(
        child: Container(
      width: 192.0,
      height: 96.0,
      alignment: Alignment.center,
      color: Colors.deepOrangeAccent,
      child: Text(
        "Pizza",
        textDirection: TextDirection.ltr,
      ),
    ));
  }
}
Margins And Padding
Margins and Paddings use the EdgeInsets.All and EdgeInsets.Only constructor. So to set a margin we can do.
...
        child: Container(
      width: 192.0,
      height: 96.0,
      margin: EdgeInsets.only(left:50.0),
      padding: EdgeInsets.All(10.0),
...
Fonts
Copy the fonts to a directory. The file pubspec.yaml contains the configurations.
  fonts:
    - family: Oxygen
      fonts:
        - asset: fonts/Oxygen-Regular.ttf
        - asset: fonts/Oxygen-Bold.ttf
          weight: 700
        - asset: fonts/Oxygen-Light.ttf
          weight: 300
Now we can use the font with the Text Widget
...
      child: Text(
        "Pizza",
        textDirection: TextDirection.ltr,
        style: TextStyle(
          fontFamily: 'Oxygen',
          fontWeight: FontWeight.w300,
        ),
...
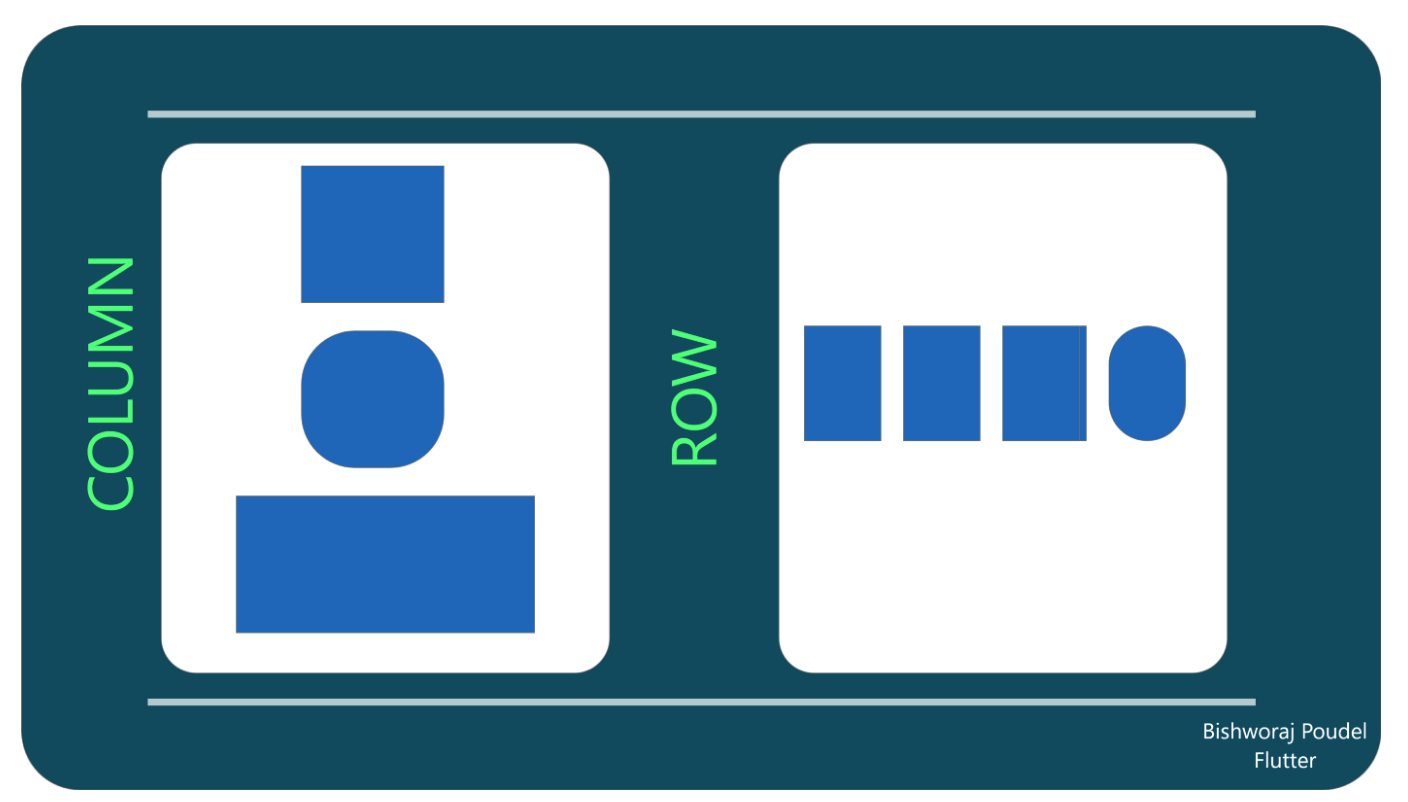
Rows and Columns
These seem to work the same as flex box.

...
        child: Row(
          children: <Widget>[
            Text(
              "Margherita",
              textDirection: TextDirection.ltr,
              style: TextStyle(
                fontFamily: 'Oxygen',
                fontWeight: FontWeight.w300,
              ),
            ),
            Text(
              "Tomato, Mozzarella, Basil",
              textDirection: TextDirection.ltr,
              style: TextStyle(
                fontFamily: 'Oxygen',
                fontWeight: FontWeight.w300,
              ),
            ),
          ],
        ),
...
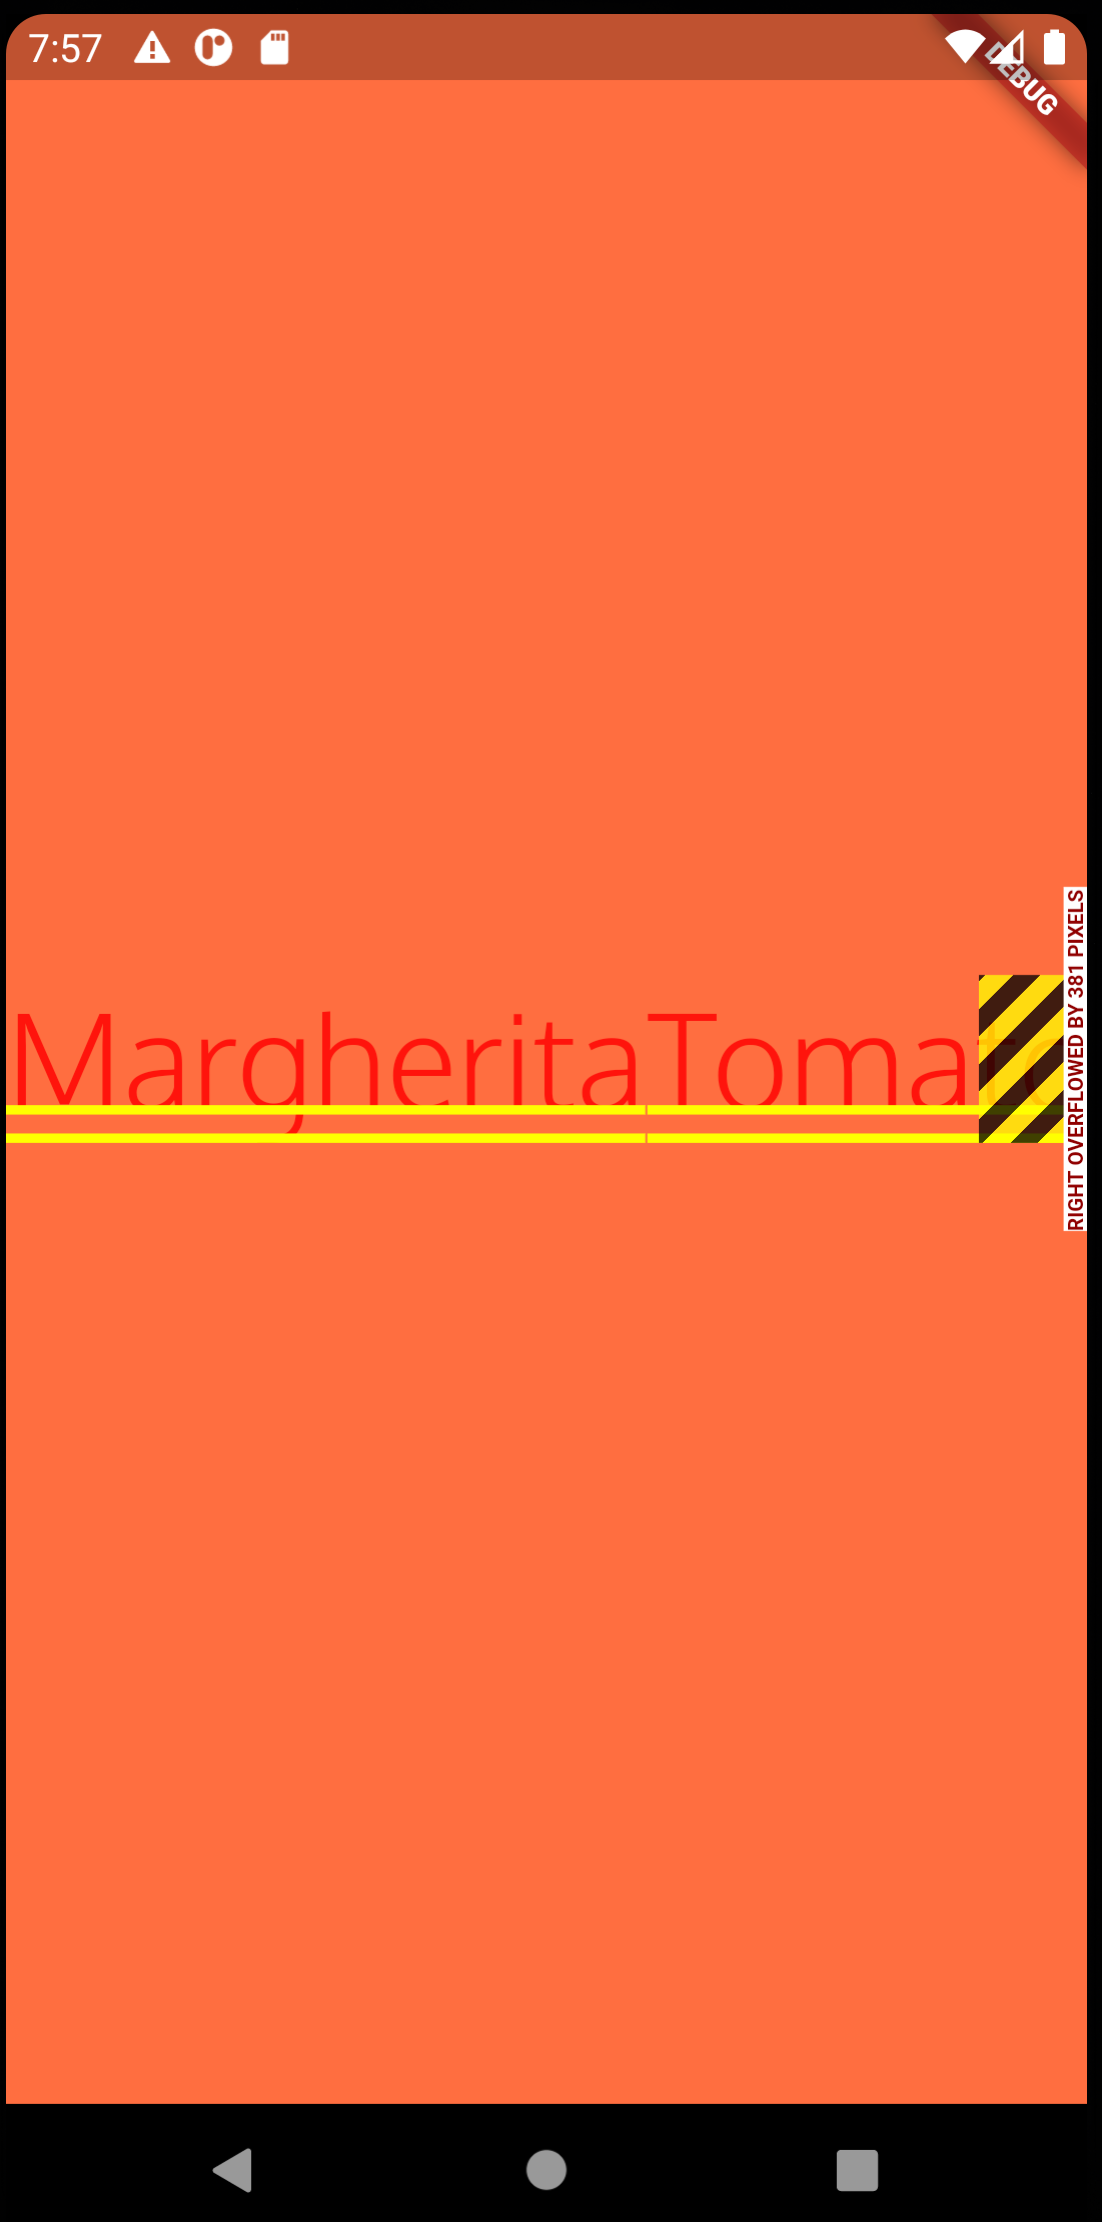
The result is items which overflow the row because the text exceeds the width of the phone.

Expanded
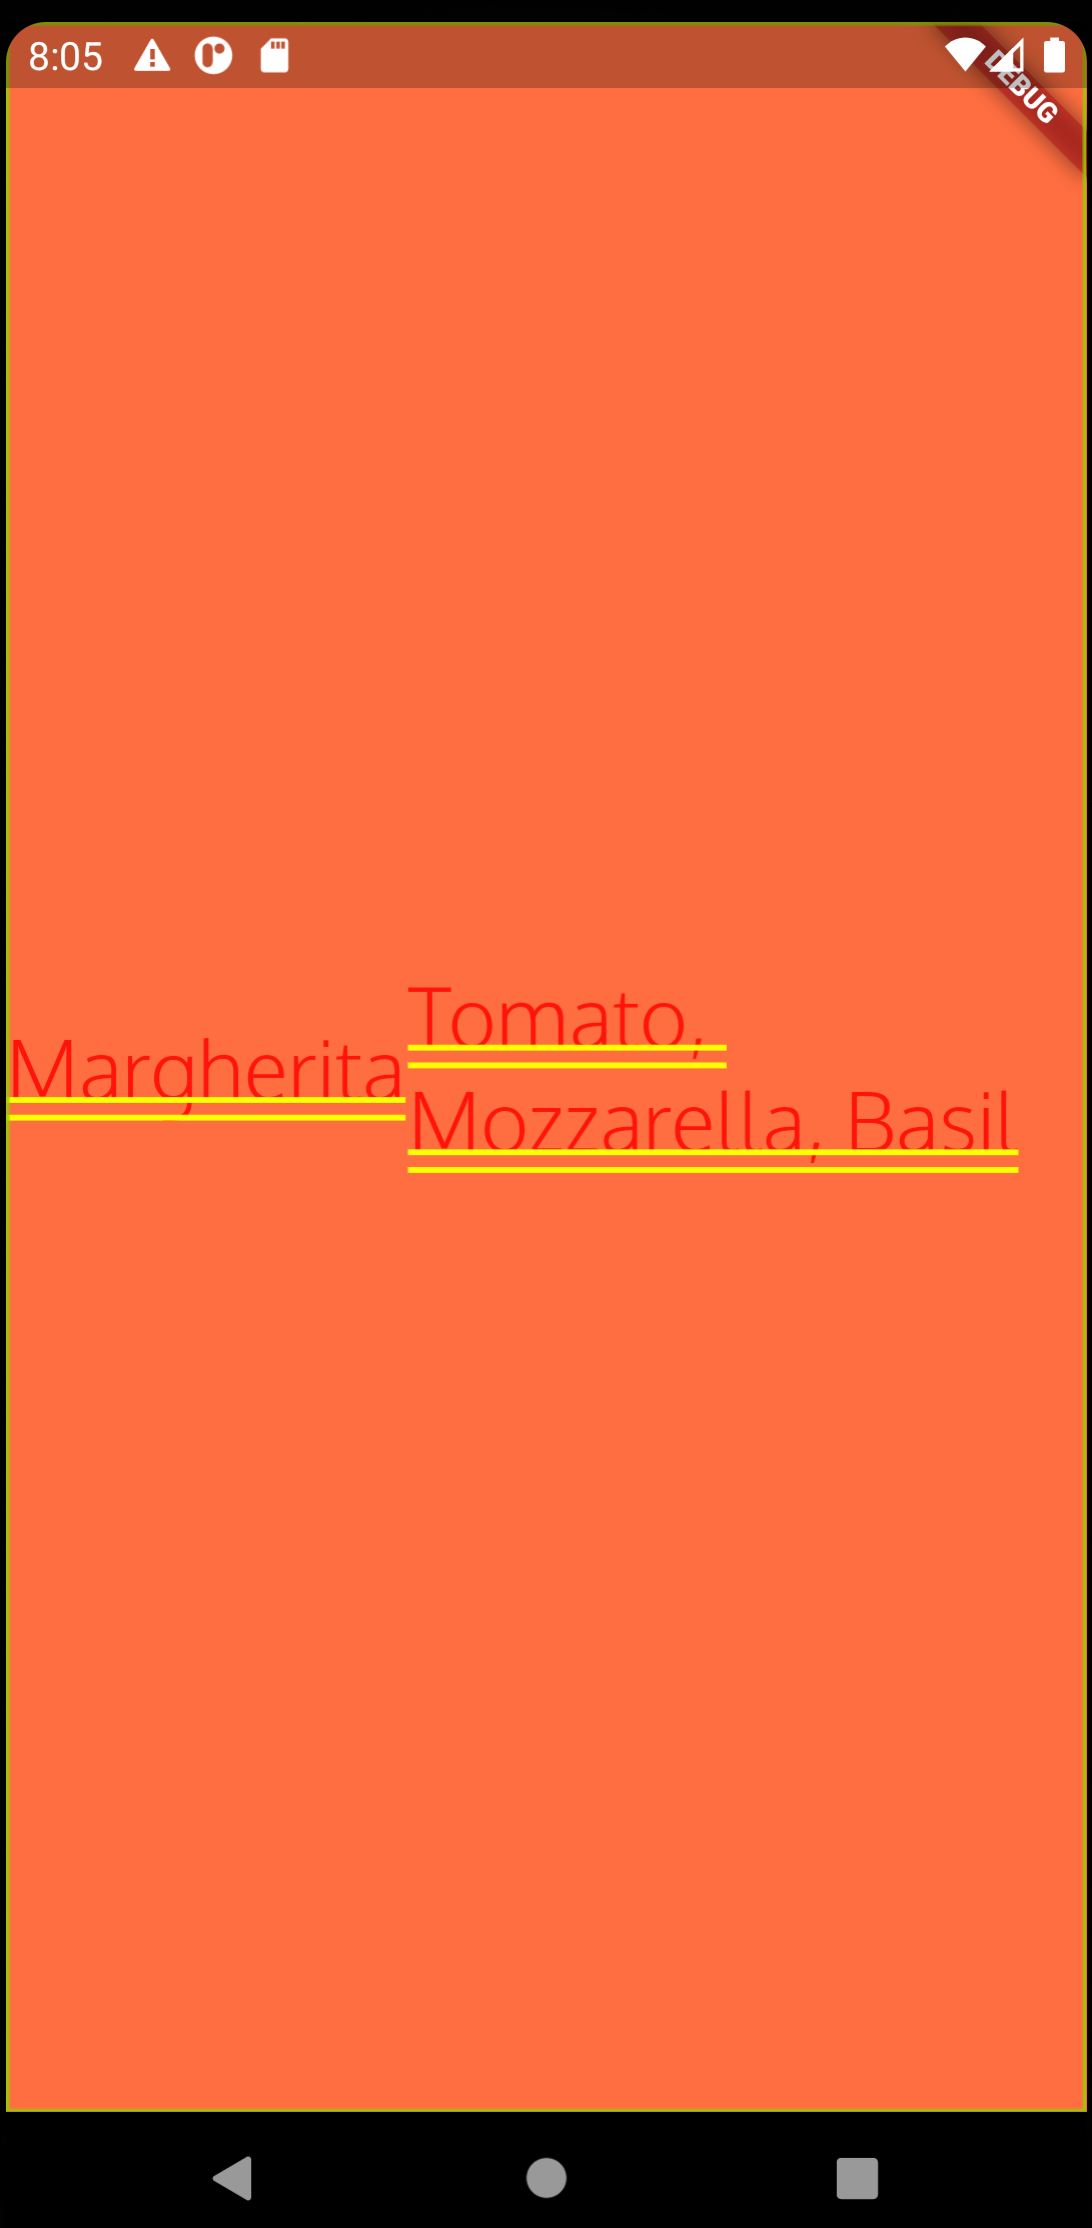
Wrapping in Expanded means that the row will wrap like flexbox wrapping.

            Expanded(
              child: Text(
                "Tomato, Mozzarella, Basil",
                textDirection: TextDirection.ltr,
                style: TextStyle(
                  fontSize: 30,
                  fontFamily: 'Oxygen',
                  fontWeight: FontWeight.w300,
                ),
              ),
            ),
Images
To Create an image we can use an asset and like the fonts this is specified in the pubspec.yaml
...
flutter:

  # The following line ensures that the Material Icons font is
  # included with your application, so that you can use the icons in
  # the material Icons class.
  uses-material-design: true

  # To add assets to your application, add an assets section, like this:
  assets:
    - images/pizza.png
...
To use the image we can create a class to hold it and wrap it in a container.
class PizzaImageWidget extends StatelessWidget {
  @override
  Widget build(BuildContext context) {
    AssetImage pizzaAsset = AssetImage('images/pizza.png');
    Image image = Image(image: pizzaAsset, width: 400, height: 400);
    return Container(child: image);
  }
}
Raised Button, Alert and Event Handler
There are now surprises and this is just an example for reference. Not the use of the onPressed function which calls the alert creation function.
class OrderButton extends StatelessWidget {
  @override
  Widget build(BuildContext context) {
    var button = Container(
      margin: EdgeInsets.only(top: 10),
      child: RaisedButton(
        child: Text("Order your Pizza"),
        color: Colors.lightGreen,
        elevation: 5.0,
        onPressed: () {
          order(context);
        },
      ),
    );
    return button;
  }

  void order(BuildContext context) {
    var alert = AlertDialog(
      title: Text("Order Completed"),
      content: Text("Thanks"),
    );
    showDialog(context: context, builder: (BuildContext context) => alert);
  }
}
Interactivity
Introduction
Classes that inherit "StatefulWidget" are immutable. The State is mutable. Using Stateful Widgets
- Create a class that extends Stateful Widget that return state
- Create a state class, with properties that may change
- Implement Build
- Call setState() method to make changes
TextField=
Below and example of a TextField
class HelloYou extends StatefulWidget {
  @override
  State<StatefulWidget> createState() => _HelloYouState();
}

class _HelloYouState extends State<HelloYou> {
  String name = '';
  @override
  Widget build(BuildContext context) {
    return Scaffold(
      appBar: AppBar(
        title: Text("Hello"),
        backgroundColor: Colors.blueAccent,
      ),
      body: Container(
        padding: EdgeInsets.all(15),
        child: Column(
          children: <Widget>[
            TextField(
              decoration: InputDecoration(hintText: "Please insert your name"),
              onChanged: (String text) => {
                setState(() => {name = text})
              },
            ),
            Text('Hello' + name + "!")
          ],
        ),
      ),
    );
  }
}
And... and onSumbmitted
It is worthwhile noting that the arrow functions work the same as the ones in javascript except alternatively you can miss out the arrow. The onChange could be written
..
              onChanged: (String text) {
                setState(() {name = text})
              },
..
Note the onSubmitted works the same as onChanged except it waits for the Enter button before being fired
Dropdown button
Not much surprise again except for how to create the list seemed a bit long winded compared to other languages.
            DropdownButton<String>(
              value: _selectedCurrency,
              items: _currencies.map((String value) {
                return DropdownMenuItem<String>(
                    value: value, child: Text(value));
              }).toList(),
              onChanged: (String value) {
                setState(() => {_selectedCurrency = value});
              },
            ),